News

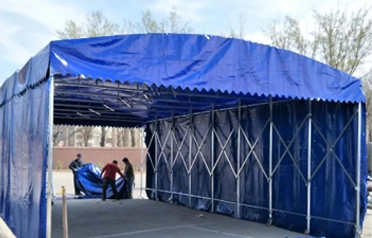
How do you install the canopy fabric for a retractable tent? Pengcheng Outdoor provides a step-by-step guide to proper installation.

2026-06-26 0 Leave me a message

Users often encounter issues—such as leaks, looseness, sticking during operation, and water pooling in folds—after installing retractable canopy covers. Pengcheng Outdoor Products has streamlined and standardized the installation process, providing step-by-step guidance for a quick and proper setup. You can complete the installation yourself without professional help, resulting in a stable, durable, and trouble-free canopy.

I. Pre-installation Preparation

Schedule the installation for a calm, sunny day and clear the site of debris, ensuring the ground is level and spacious. Have the necessary tools ready in advance, such as a spirit level, screwdriver, cable ties, spring hooks, and expansion bolts. Additionally, inspect the retractable canopy frame for deformation and ensure the pulleys glide smoothly; check the canopy fabric for tears or loose stitching, and verify the correct orientation and drainage dimensions to ensure a successful installation.

II. Assembly of the Retractable Canopy Frame

First, join the uprights and crossbeams, tightening the screws to ensure a tight, secure frame. Install the arched roof supports, maintaining symmetry to ensure balanced load distribution. Lay down the pulley tracks and use a spirit level to ensure they are perfectly horizontal; this prevents future sticking during operation or wrinkling of the canopy fabric. Finally, secure the entire frame by anchoring the bases with expansion bolts to eliminate any wobbling or shifting.

III. Key Steps for Installing the Canopy Cover

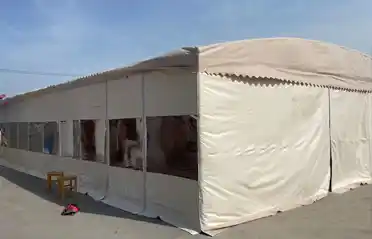
After verifying the frame's integrity, unfold the canopy cover, identify the correct side, and center it for placement, ensuring an overhang of approximately 20 cm to facilitate drainage. Secure the four corners first, using spring hooks to apply light tension and shape the cover, thereby preventing loose corners from catching the wind. Next, evenly tension the cover outward from the center toward both sides, reinforcing it with cable ties or adhesive strips at 30–40 cm intervals to ensure a smooth, wrinkle-free surface. Finally, pay special attention to reinforcing seams and corner gaps to prevent edges from curling or water from seeping in.


IV. Installation Acceptance and Pitfalls to Avoid

After installation, repeatedly extend and retract the canopy to ensure smooth operation without sticking or jamming. Check that the canopy fabric is taut and free of depressions where water might pool, and verify that all anchor points are secure. You may also perform a simple water test to check for waterproofing effectiveness. Avoid common installation errors such as forcefully tugging the fabric, installing the tracks unevenly, skipping reinforcement details, or installing the fabric backwards; these mistakes can lead to premature aging, leaks, and damage.


V. Simple Maintenance Tips

Regularly clear debris and pooled water from the canopy fabric, and promptly remove accumulated snow during rainy or snowy weather. If the canopy is to be stored for an extended period, clean and dry it thoroughly before packing it away. Promptly repair any loose parts or unraveling seams to effectively extend the service life of the canopy fabric.

The keys to a successful installation are a stable frame, precise alignment, even tension, and reinforced details. Following these standard procedures ensures the installation of a canopy that is wind- and water-resistant and operates smoothly. For customization, fabric replacement, or professional installation guidance, please contact Pengcheng Outdoor Products.


Related News
Leave me a message
X
We use cookies to offer you a better browsing experience, analyze site traffic and personalize content. By using this site, you agree to our use of cookies.Privacy Policy
RejectAccept